The Weaver’s windows of Shoreditch

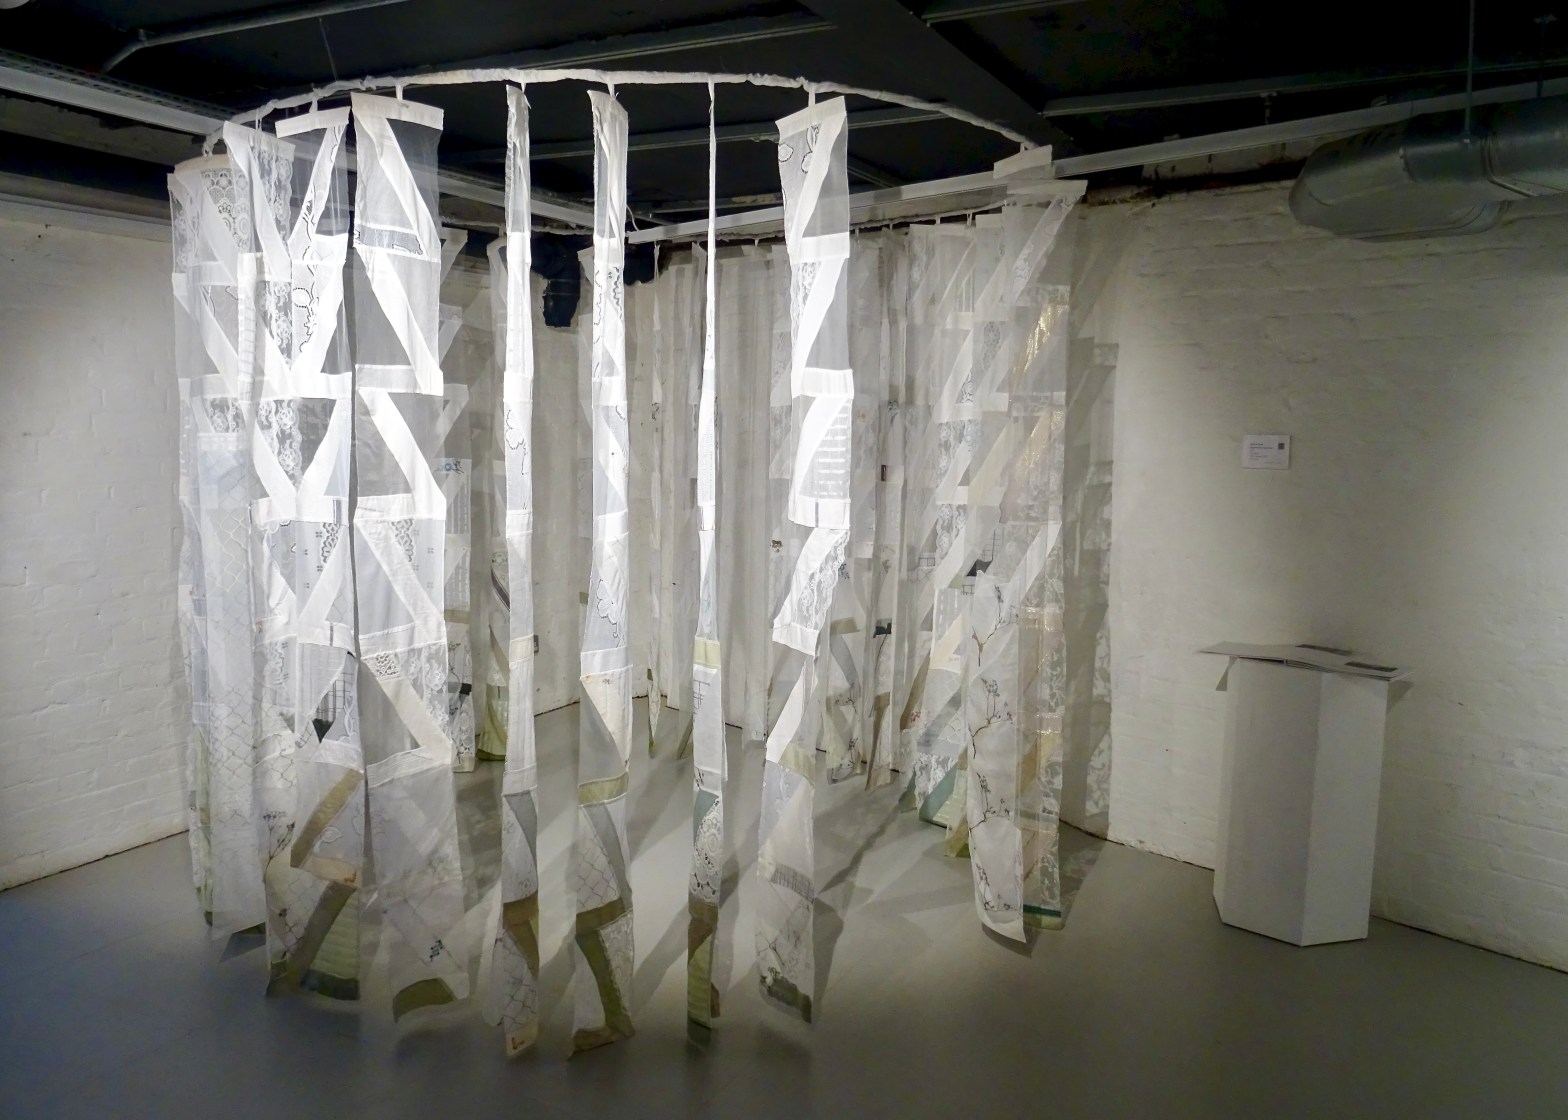
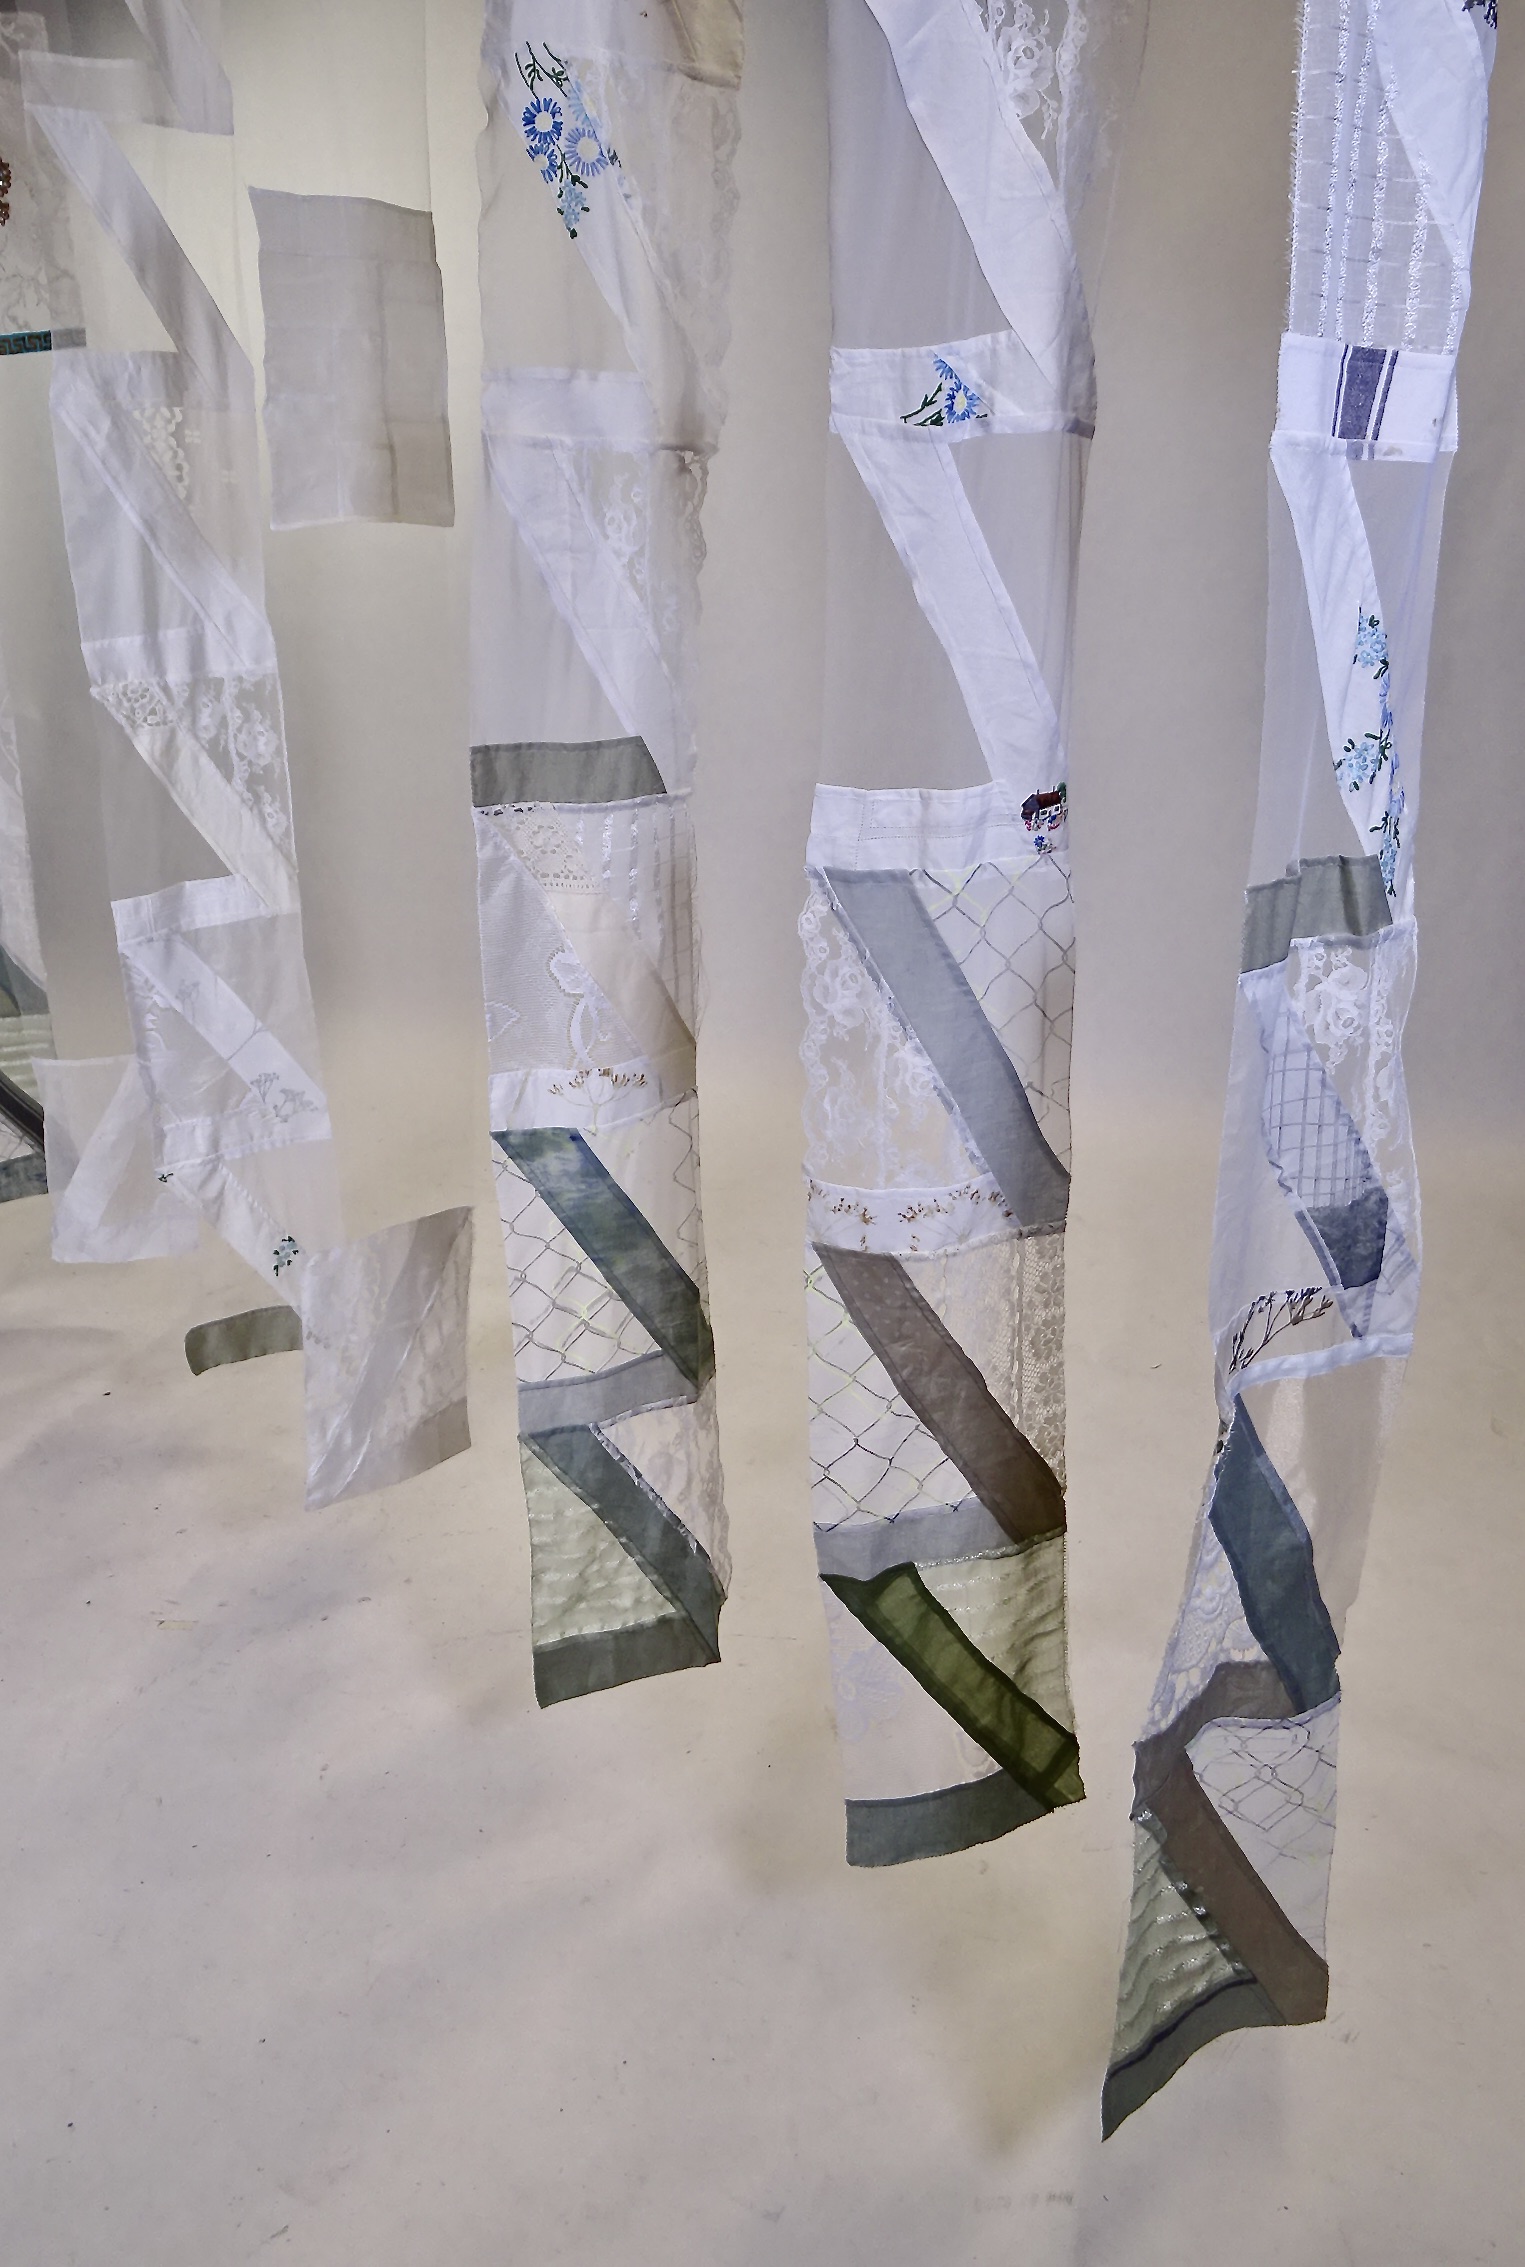
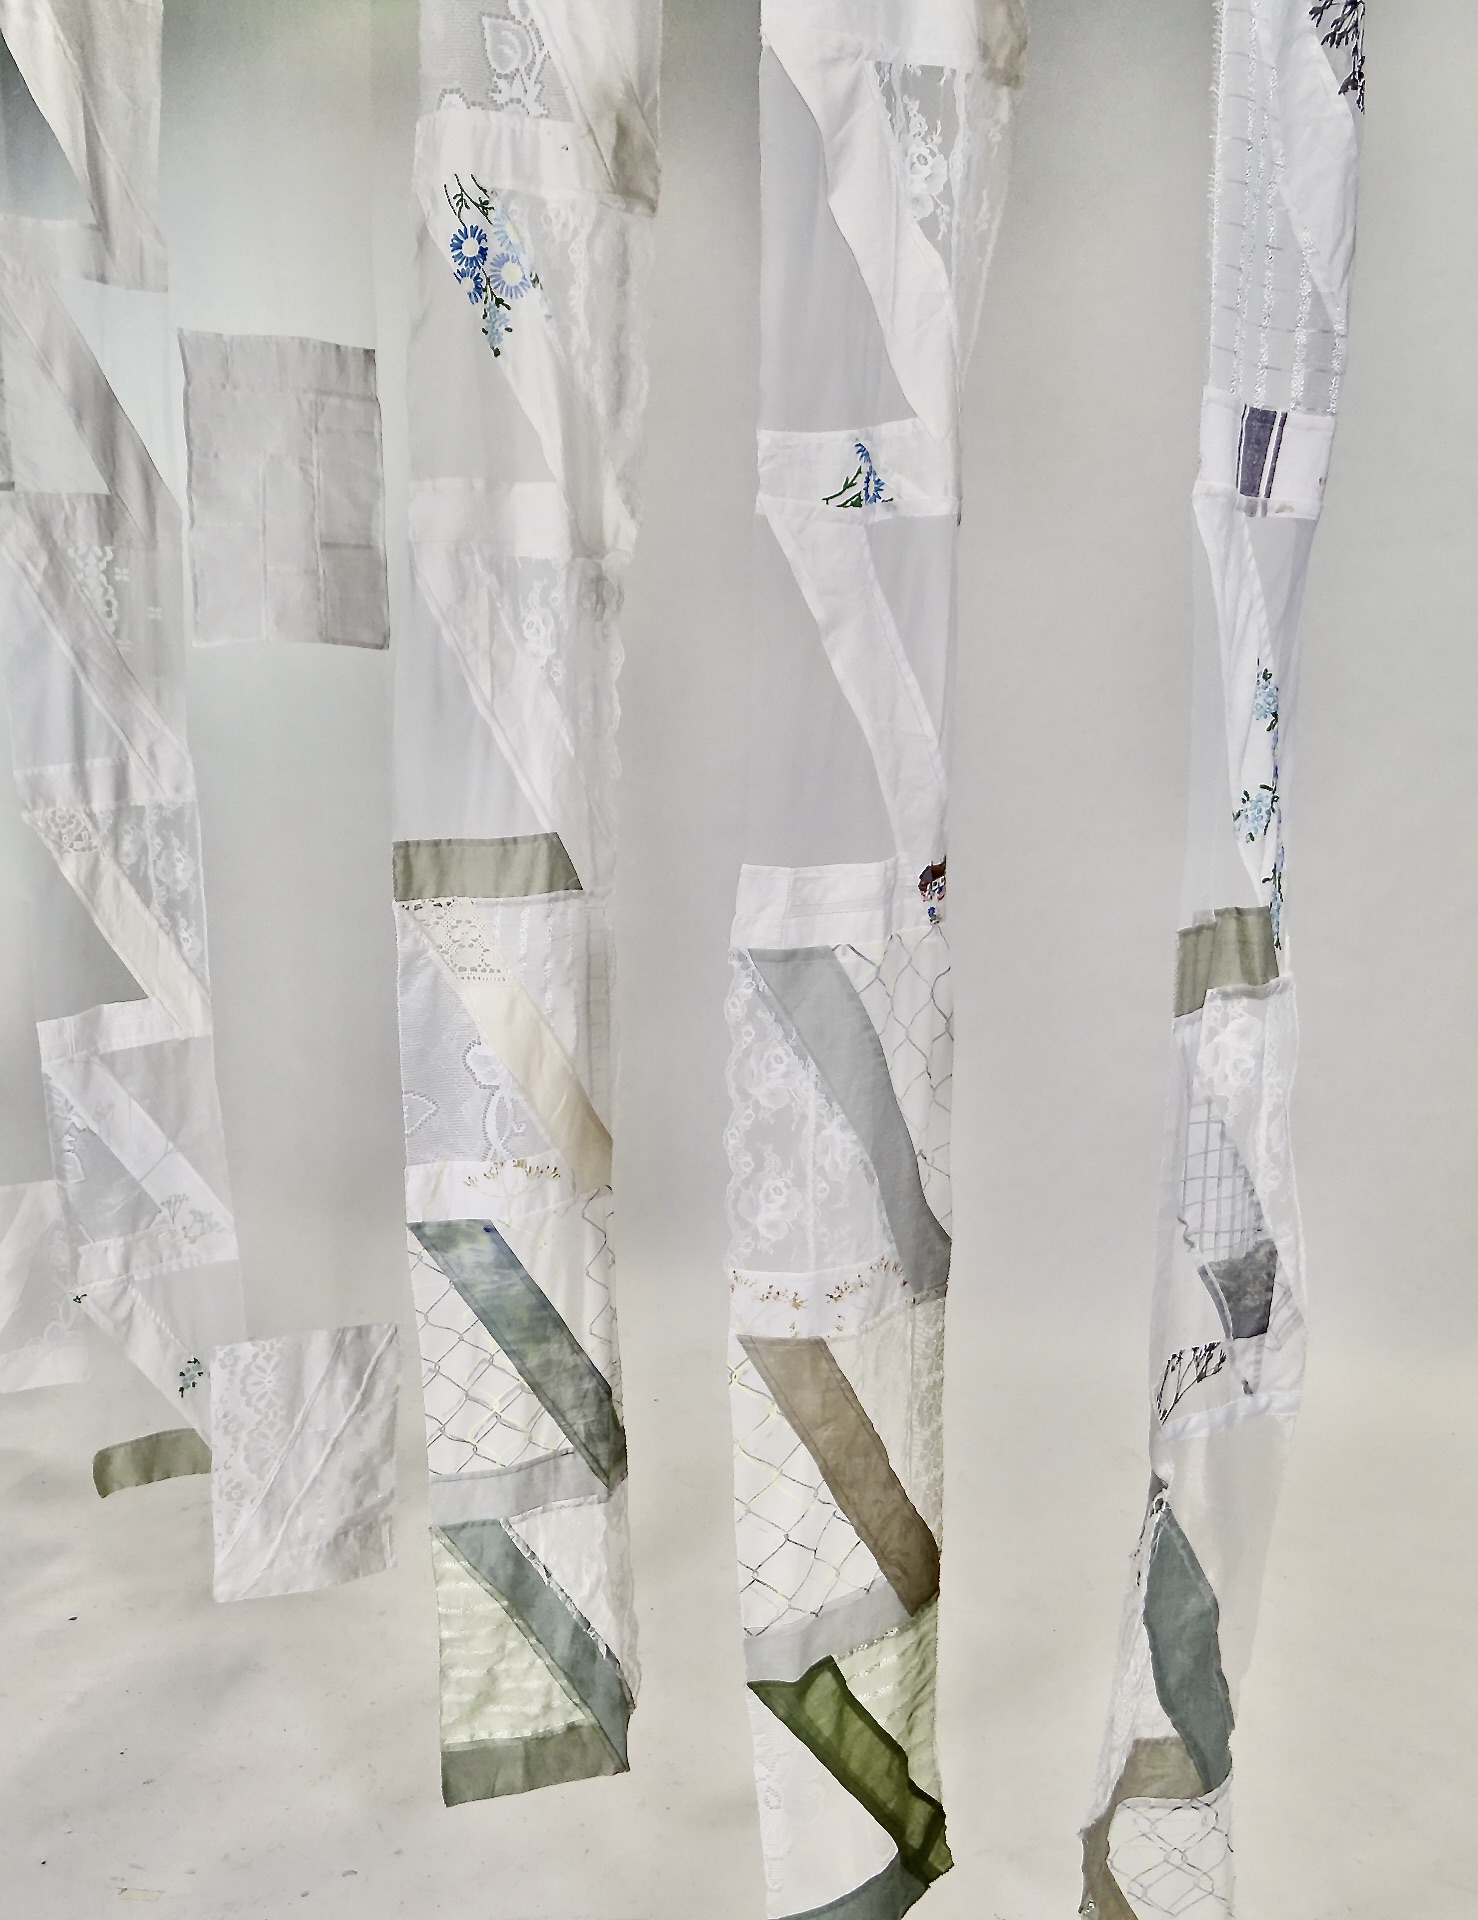
This post is intended to bring a short summary of my research into proposing a new textile art installation based on the distinctive windows of the (now demolished) Weavers’ Cottages that were built in Shoreditch to house the Huguenot silk weavers.

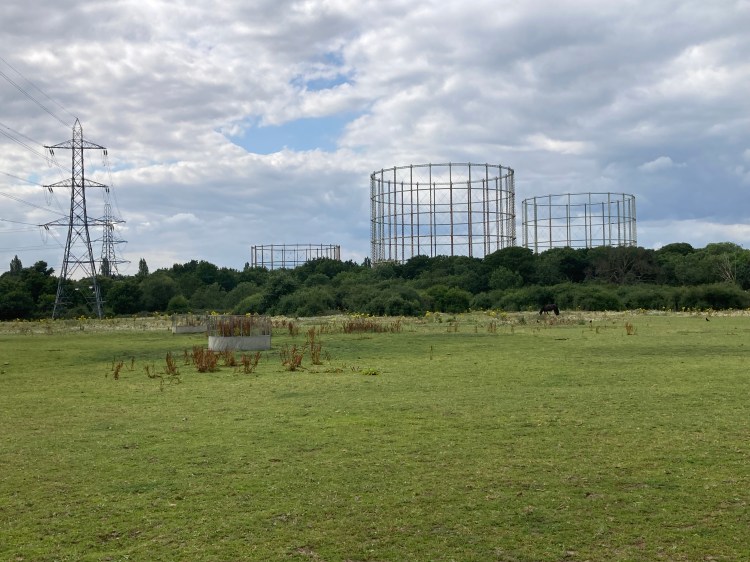
Today, there is a place in Shoreditch called Weaver’s Fields (their apostrophe, not mine). It is an open space made up of grassed areas interspersed with trees, paths and a statue. There isn’t any information on site about the origin of its name, so I set about trying to find out a little bit more.

Weaver’s Fields with the City of London in the background

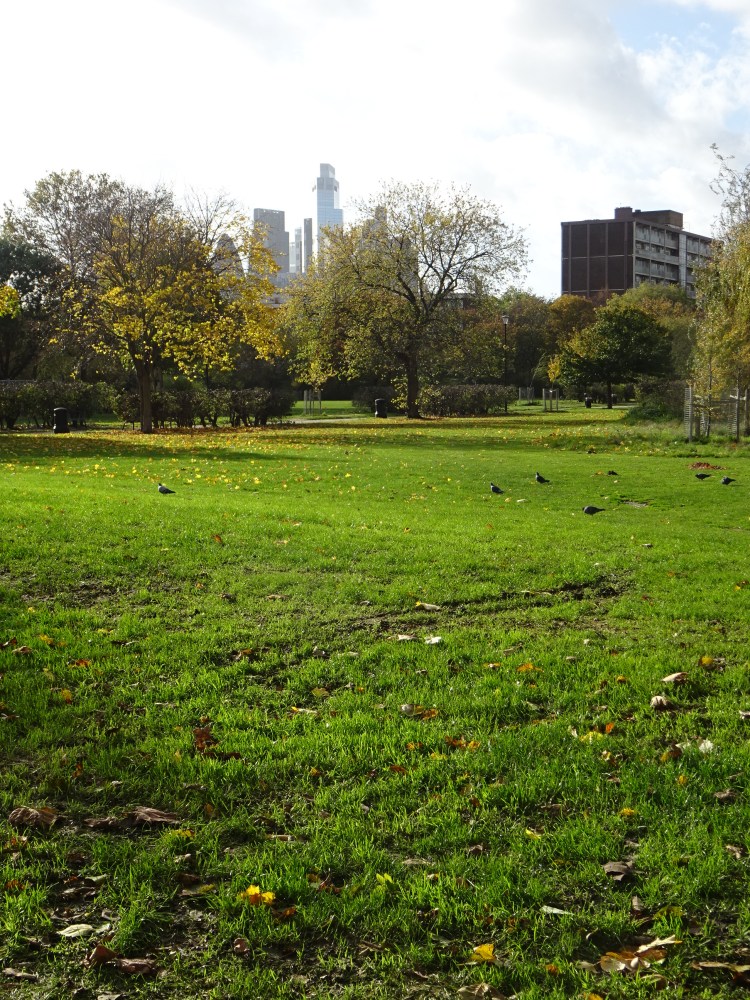
I asked the question: why is there such a large open space at Weaver’s Fields? The answer lies in slum clearance that took place in the mid 20th century. In undertaking this demolition, the area lost one of its defining cultural markers: Weavers’ Cottages.

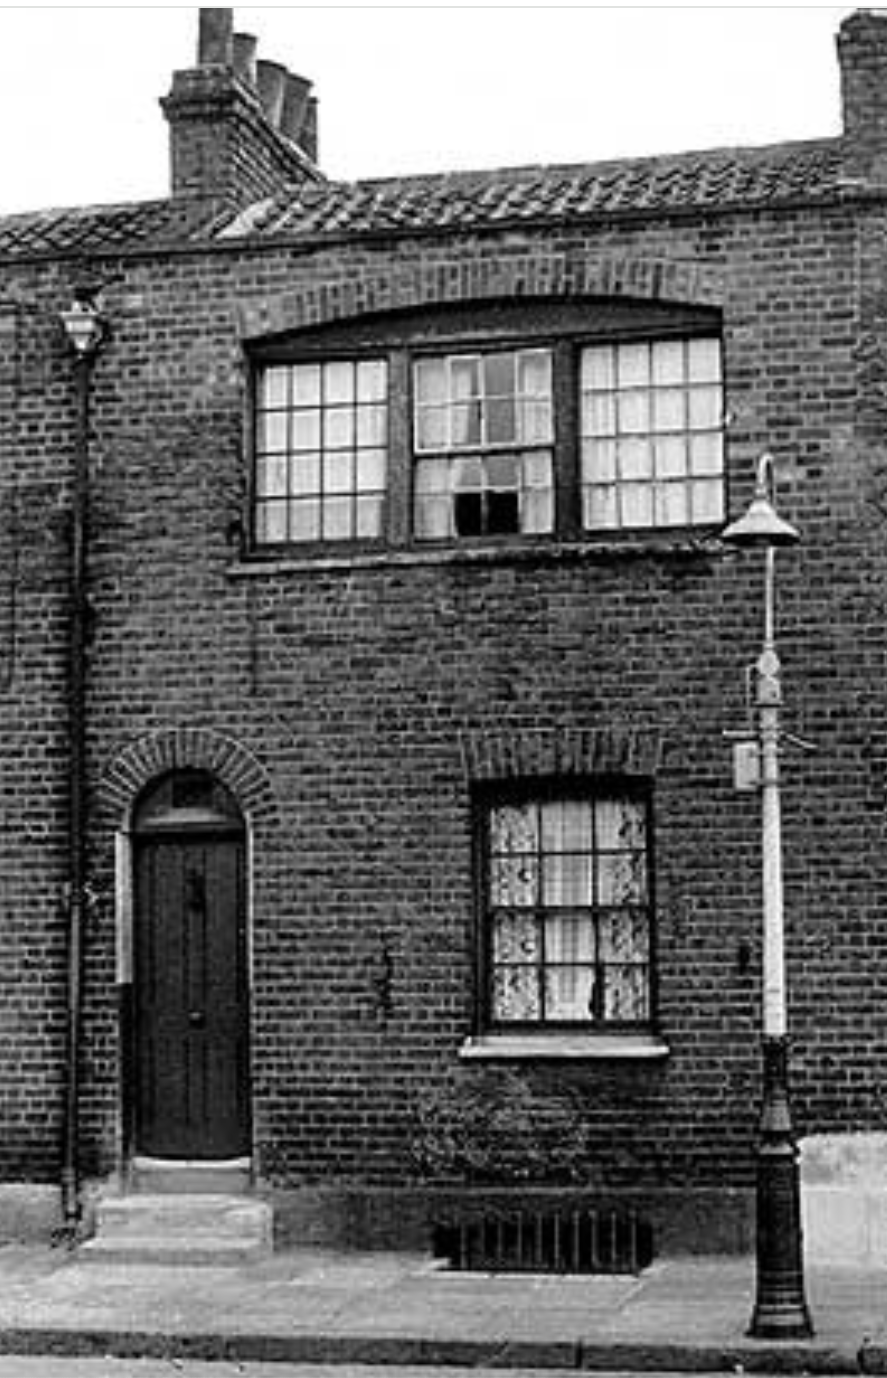
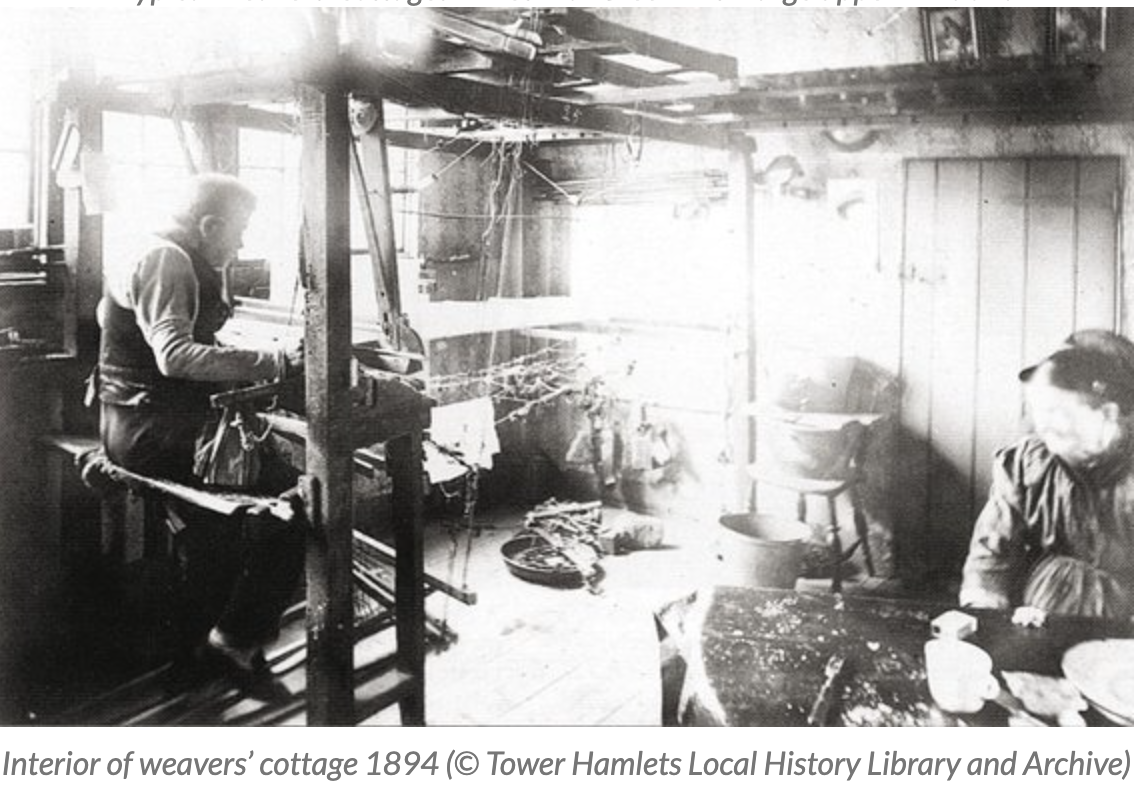
Photos extracted from: https://wilmotst.com/758-the-lost-streets-of-weavers-fields-pt2 and Tower Hamlets local archive

These distinctive buildings were terraced homes built with a large first floor workshop window, where the many highly skilled weavers (who made the area famous) worked. The house design was directly associated with the light needed for these workers to function effectively. Living quarters were on the ground and basement floors. The London County Medical Officer found that this design of home in the area was defective and beyond repair. First scheduled for destruction in 1938, the Second World War intervened and in the 1950’s demolition started. This episode in the story of Shoreditch has been glossed over and does not appear to be something that local historians are willing to acknowledge.

If you are interested in finding out more, then please look at the wonderful blog dated 21st May 2021 at https://wilmotst.com/758-the-lost-streets-of-weavers-fields-pt2

I think it is important to celebrate this part of Shoreditch’s history, as both the existence of these buildings and their destruction were very significant to the character of the place.

In my research, I put forward the argument that no place is subject to a single layer of history or a single story. A place is multi-faceted and is influenced by everything that has happened there in the past. It is my view that for placemaking to be most effective, every part of the story of a place has to be recognised and understood and there will always be some parts of a story that is uncomfortable to hear. By acknowledging difficult episodes, we can add depth and humanity to placemaking. By challenging accepted public discourse, I discovered the origin of the playing field name. I consider that deliberate omission of a story this significant is likely to engender resentment from those who wish to remember or who subsequently discover the omission and wonder what other information has been censored.

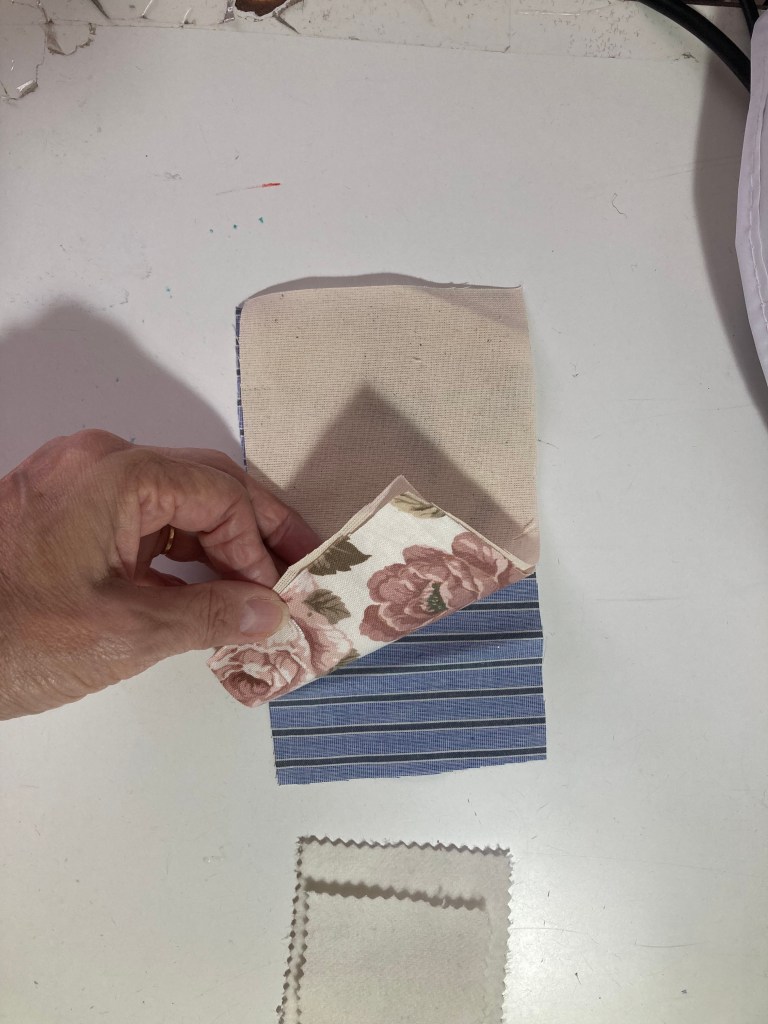
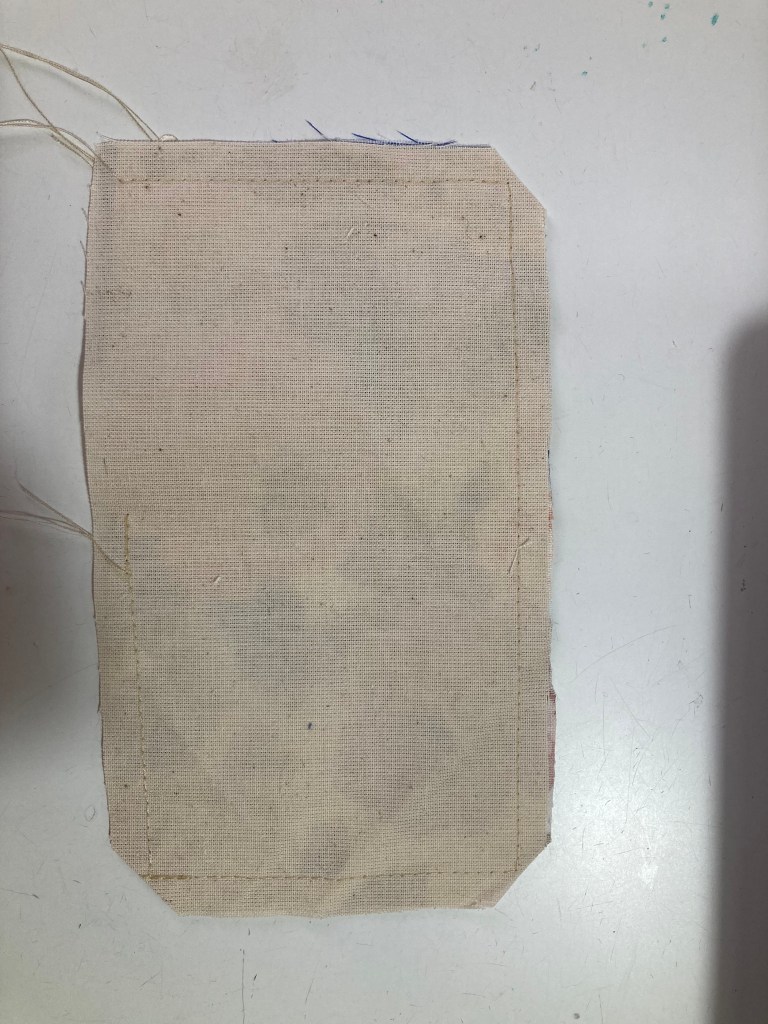
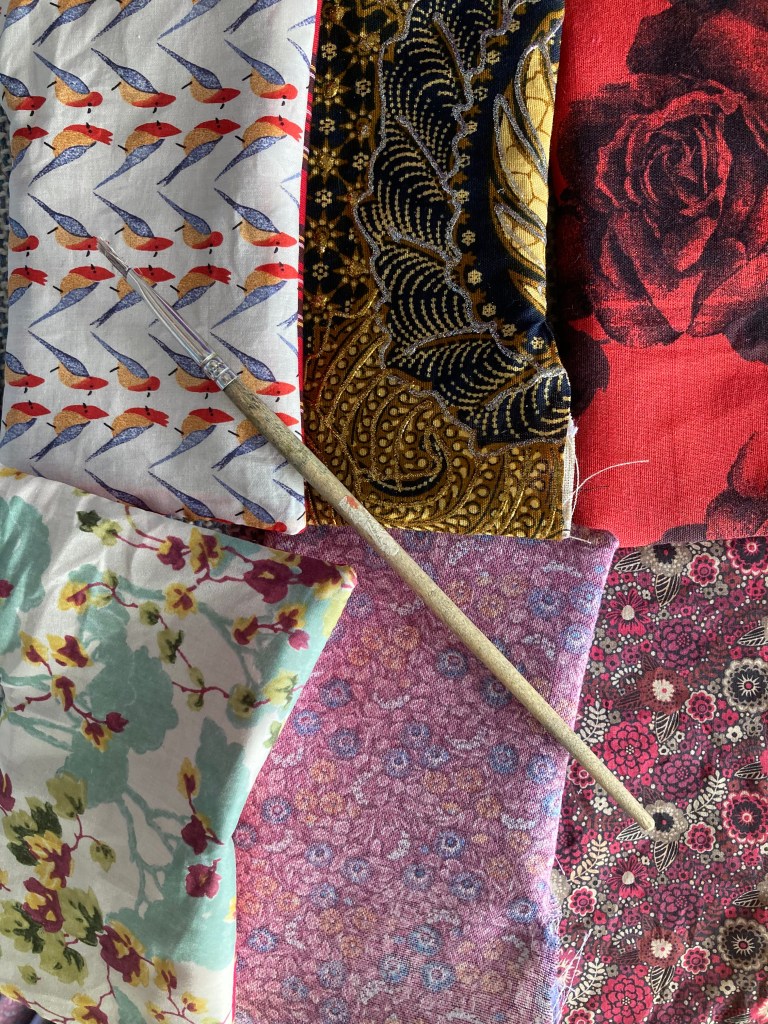
My proposal for a large textile piece is a life-size (4metres wide) Weaver’s window constructed out of textile. It will feature “panes of glass” that are printed maps of the area made by Charles Booth (at https://booth.lse.ac.uk/map) and surrounded by brick patchwork.

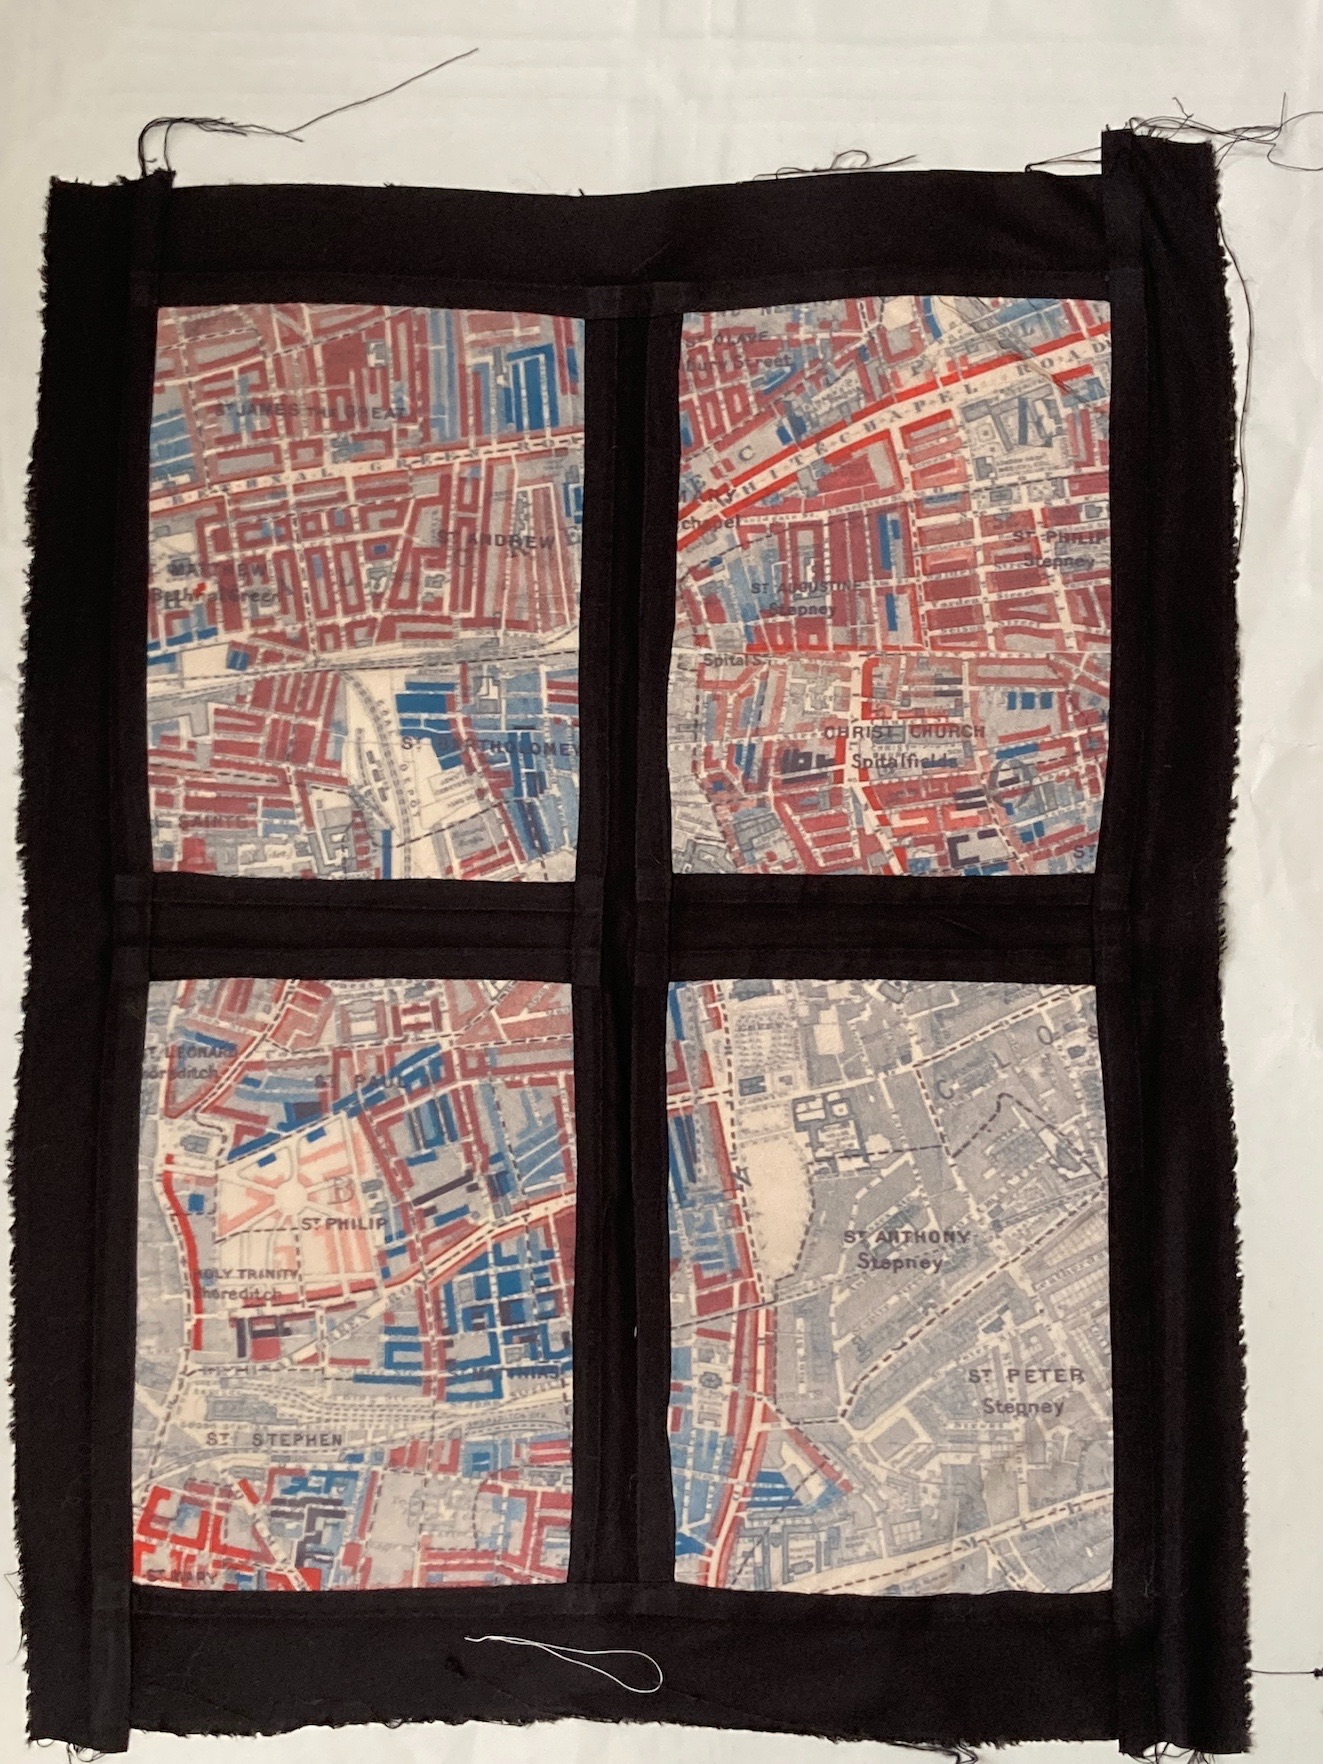
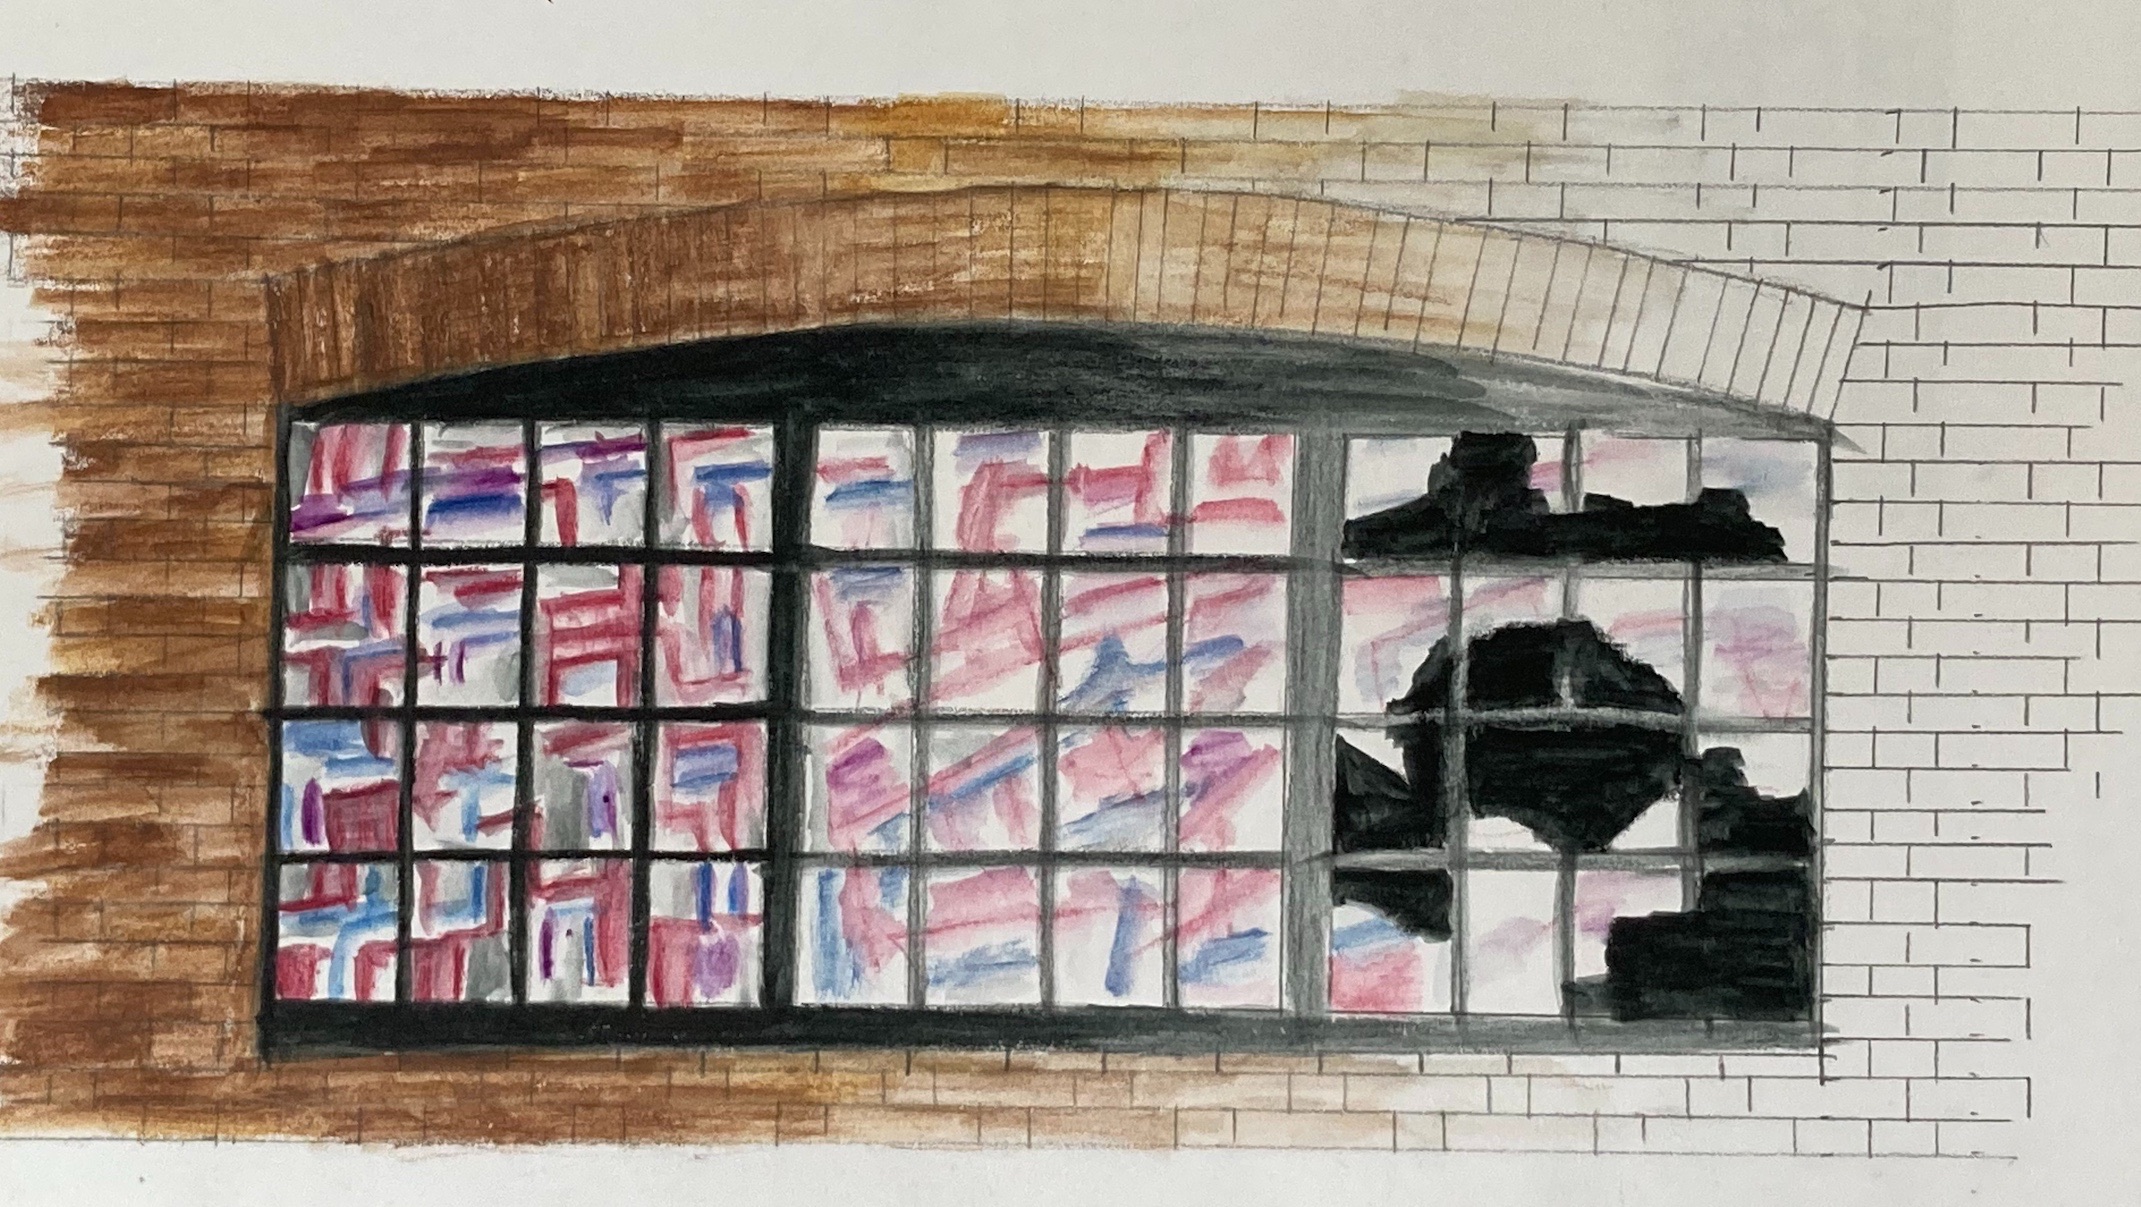
If you or your gallery/exhibition space would like to commission me to make this installation, then please contact me

Motspur Park Gas Holders

As a part of my MA textile coursework, I created a textile art installation based on the now derelict Motspur Park Gas Holders.

My research focussed on the history and growth of Motspur Park, which is a suburb of London. It is an area that crosses the borough boundaries of Merton and Kingston yet has a distinct identity. Its initial sudden expansion from 1925 onwards was a result of the aspirational middle classes moving from inner London and over the ensuing years, incomers from all over the world have come to live here.

“The development of Suburbia has become a matter of lifestyle preference and one of the strongest markers of national identity” (Vesna Goldworthy, Suburban Identity, The Smith Institute, Chapter 1). Goldsworthy goes on to say that ” In the “New World” of suburbia, we are all incomers and we can all belong”. It is apparent to all who live here that this place is dynamic and constantly changing as infrastructure becomes obsolete and is renewed or replaced. This also highlights another strand of my research into change and transition that introduced me to the Buddhist doctrine of impermanence, whereby change is embraced with an affirmative attitude and can be liberating, for example, recognising that illness will pass.

My textile art installation of the gas holders is made with material circularity in mind entirely from discarded domestic fabrics (tea-towels, net curtains, tablecloths and so on) that have been part and parcel of everyday suburban life in Motspur Park over the last 100 years. These fabrics are instantly recognisable and many viewers have commented on my use of doilies like their Gran used.

This video was created with the gas holders in the background to test if my proposed material choices work.

Below are some examples of the individual pieces of the textile gas holder.

The textile gas holder final piece has been exhibited in a number of exhibitions, both in Motspur Park itself and across London. If you would like to see it, please follow me on Instagram: sarahmcalister.textileart to get tour dates.

Visitors to the Canvas and Collective exhibition at Morley Gallery in March 2025 experienced a sense of calm and serenity when standing inside this interpretation of the Motspur Park gas holder. If your exhibition space or gallery would like to host the gas holder installation, then please contact me .

Comfort knitting

My knitting is a comfort activity that keeps my busy hands occupied while watching TV and during long journeys. As a result, what I knit is quite important: it can’t be too complicated, or require constant checking on a chart or row counting but still needs to be “serious” enough to keep my attention.

I’ve done socks and have knitted so many for gifts that the pattern is seared on my memory. Time for a change!

I wanted to have a go at knitting another shawl and there are many beautiful patterns available. My demands for something easy to remember, but not boring was a tough challenge. In the end I mashed up two patterns to achieve this result.

The main body of the shawl is adapted from a free pattern in the Simple Collection by Tin Can Knits called GRAIN. The yarn I used is Schoppel Zauberball Crazy in Cool Botanical Garden colour way. I interspersed two rows of King Cole Merino Blend 4-ply in Kingfisher shade at random points, joining the yarns by a loop through method that is illustrated in a separate blog here. This did mean a slightly bulkier join, but is much more hygienic than spit-splicing when knitting on public transport and avoids sewing-in.

The lacy edge is a variation on one by Kate Davis and is a variation on the edging from her “Hap for Harriet” pattern. I knitted that hap several years ago and found the edging a very memorable design that is easy to knit and remember as the shawl goes on.

The shawl in the pattern is in plain knit and I wanted smooth stocking stitch, so instead of every row being knit as given in the in the pattern, I knitted one row and purled the next.

When the Grain shawl was big enough, I left the stitches on a long double pointed needle. I calculated that I should knit the Grain pattern section until the number of stitches all the way across was a multiple of six (that is the pattern repeat for the edging), plus five centre stitches. I did this, but still had to bodge a bit in the centre, having dropped a stitch further back (when the England football team scored, some stitches fell off the needle!) and didn’t notice until much later on.

Be aware that when starting the Kate Davis edging from the outside edge of the shawl, one side will be pattern on knit side, the other will be pattern on the pearl side (swap knit/pearl for each side, so it’s symmetrical.).

Pick up a stitch from the main shawl on each Hap for Harriet pattern row and knit it together with the first stitch on the edging section.

When you get to the centre five stitches, store the 25 lacy edge pattern stitches on a holder and start the other side of the lacy edging, remembering to reverse the knit/purl rows.

At centre, I needed to make up a lozenge shape to fill the gap. This will keep the continuation of the two hole pattern going for the length of the shawl.

Here are my made-up directions: pick up the remaining centre five stitches on a double pointed needle in the shawl and set up as follows:

Checking that the knit/purl sides are correct, knit 2, place marker, yarn over, knit1, yarn over, place marker, knit to end

turn

pick up edge stitch purl wise and purl this and the first stitch on your working needle together, purl to marker, slip marker, purl1, slip marker, purl to last stitch

turn

pick up edge stitch knit wise, knit this together with the first stitch on your working needle, knit to marker, yarn over, slip marker, knit 1, slip marker, yarn over, knit to last stitch

turn

repeat these two rows until you have no further edge stitches to pick up ending with a purl row.

Now we need to decrease the lozenge shape.

first decrease row: knit 1, knit 2 together, knit to 2 stitches before the marker, knit two together, yarn over, slip marker, knit 1, slip marker, yarn over, knit 2 together, knit to last three stitches, knit two together, purl 1,

turn

purl across all stitches

turn

continue these two rows until 5 stitches remain

knit two together, remove marker, knit 1, remove marker, knit 1, knit two together (3 stitches remain)

turn

knit all three remaining stitches together and bind off

Other than the last bind-off, there shouldn’t be any ends to sew in as the looping join has been used throughout, but check and trim any ends neatly.

Wash gently according to yarn band instructions.

Block. See my previous blog on how to block a shawl. I use large towels on a carpeted floor and ordinary sewing pins. there isn’t any need to buy loads of new expensive equipment for this process.

Joining yarn colours (without having to sew the ends in)

This looping method of joining different yarns is easy once you get the hang of it.

Here it is in easy steps:

Free Sewing Workshop!

On Sunday 7th July 2024, I will be running a free sewing workshop at the Morden Family Fun Day at Morden Park. I will be showing you how to make little needle cases to take away with you either to keep or give as a little gift. This workshop is funded by Morden Rotary, but a donation for taking part will be welcome. All of the fabrics and threads have been donated by kind friends and I am very grateful to them.

If you can’t be there or don’t have time to take finish your needle case on the day, here are the instructions:

First, take your two outer pieces of fabric and place them right sides together. Then place the inner calico on top.

Now, stitch the edges nearly all the way round with a seam allowance of about 1 centimetre. You need to leave a gap of at least 4 centimetres so that the fabric can be turned the right way out. I have stitched this by machine, but you could hand sew using a neat backstitch instead if you wish.

Next, clip three of the corners as shown, taking care not to cut through the stitches.

It’s now time to turn the case the right way out, making sure that the calico remains on the inside. You might want to use a knitting needle, or something similarly blunt to gently push out the corners. I used the handle of a paintbrush. Be careful not to poke through too hard as I did here! If you take part in the workshop, you will receive a part-made case like this.

At the workshop, you will start here. Carefully turn the raw edges of the gap inwards and pin the edges together.

This opening needs to be stitched together. Using ordinary thread, oversew the edges together.

The inner fabric pages can now be prepared. With the outer case front side down, measure halfway across it and mark this point with a pin at each outside edge. Measure halfway across the inner pages and mark these with a pin at each edge. If you wish, you can mark up with a disappearing pen to help line up your stitches. Now line up the centre markings/pins so that the inner pages sit nicely in the outer case with a small border all around. Securely pin all of the pieces in this position and remove the “marker” pins.

The centre pages are sewn in using a basic running stitch and strong thread. I started and ended between the inside of the outer case and the outer of the centre pages. Using strong thread, tie a knot to secure the end, leaving a long tail of about 5 centimetres. Then commence long running stitches to the other end of the centre line, finishing on the outside of the case. My stitches were about 1 centimetre long. Turn the case over and using the same running stitch, sew back across the centre line of the case, filling in the gaps in the stitches. Bring the thread through to the place where you started these stitches. Tie a secure knot and trim the ends off.

You now have a lovely little needle case that you can decorate as you wish. There will be some decorations available for you to use at the workshop or you can do that later. Either way, you can now take it away and enjoy your sewing

Is your online hat purchase a disappointment?

Have you bought a hat online and been truly disappointed when it arrived? Perhaps it can be revived and restored.

Recently, I have been contacted by several people who have purchased felt hats online that were delivered in completely unsuitable packaging. Strangely (no I’m kidding, it’s really obvious!) these hats have arrived in a dreadful condition and were pretty much unwearable. Here’s an example showing before (left) and (right) after I had magic’d it back to life:

My millinery and hat making skills enabled me to return these unfortunate hats to pretty much their former glory.

Here’s the process I used on a crumpled felt porkpie hat: The first job is to restore the crown, because it has arrived in pretty poor shape as you can see from the photos below left. With a little help from some steam, I gently stuffed the insides with tissue paper, taking care not to stretch the soft felt. The next stage was to fix the ridge at the top of this porkpie hat with rope and pins while the felt was still damp from the steam, so it set back into place.

Once that was dry and the crown shape re-established, it was time to look at the brim. This poor hat had been quite biffed up, so before doing anything else, I needed to straighten up the brim to sit nice and evenly. The brim was gently steamed and then I put a curved hat block weighted on top of the brim (bottom photo below).

After straightening out the brim, the porkpie hat needed its proper all-round little turn-up restored (as shown in the promo photo below left). This work was a bit more delicate and done by using more steam, then hand-shaping and pinning it to hold it in place while it dried out and set its shape (photo below right).

With my work now finished, I think you will agree that the hat is in much better shape now!

If you have received a disappointing hat, perhaps it can be revived and restored. I am happy to make an assessment of a hat by photo and can advise on the best course of action.

contact me:

by phone: 07905 657343 (during sensible UK hours please)

by email: sarahmcalisterhats@gmail.com

Towards Zero

(With apologies to Agatha Christie for pinching the title)

As a part of my hat making practice, I sometimes have to use acid dye to colour hats, fabrics and feathers for a customer. Regardless of how careful I am to only make a small dye bath, this often leaves me with an amount of unused dye liquid. In my last post, I mentioned that I tried to use up some red dye left-over from another project, with limited success.

I am currently studying for an MA Textiles at University of the Creative Arts at their Epsom campus. That course focusses on creating and developing textile outcomes in a sustainable way. In the past, I have considered using yarn only in its natural colour (see my post about knitting a Fair Isle Cardigan). Another option is to undertake the brewing up of natural dyes, but I haven’t found enough hours in the day for me to take that project on yet!

Back in the good old hat-making days, I bought a rainbow of little Dylon acid dye powders from which to mix up the required colour. About ten years ago, these dyes became unavailable and I am gradually using up my limited remaining stock.

In this post, I will attempt to use up all the colour in a dye bath that is left over from another project and record below what happened and whether it was successful.

The yarn

This is a fine two-ply Swaledale yarn labelled as July 83 that was acquired from a “help yourself” table. I used four skeins of yarn. This was soaked in a weak vinegar/warm water solution for about ten minutes, to open up the fibres.

The dye bath

Then the first skein of yarn was placed into the dye bath which was made up of a mixture of cerise and navy blue powders to achieve the colour I required for my initial project (see the lace on the right in the photo below). The dye bath is a fish kettle bought from a charity shop and is an ideal shape for dyeing skeins of yarn and feathers. There wasn’t enough liquid in the kettle to completely submerge the yarn, so I made the decision to deliberately dye it unevenly. Let’s see whether or not that was a good decision.

After a few minutes, I removed the yarn from the dye bath and rinsed it to assess the colour uptake. I was satisfied with this, so placed the next skein into the dye bath. This was not noticeably paler in colour, but was slightly less blue, making the colour a fractionally different tone. The second skein was removed and the dye bath still had a nice lot of colour, so a third skein was placed in. This came up slightly lighter. Both the second and third skeins were dyed unevenly and the mottled effect is rather attractive while the yarn is still wet.

There was still a little colour left in the dye bath, so a fourth (and final) skein was placed in it. This was noticeably paler and has come out a lovely soft pink. The dye bath still retained a little colour, but there was not sufficient volume nor dye left to do anything, so I decided to make that do and threw the rest out.

In the photo below are the resulting dry skeins of yarn in order of dyeing from top (first) to bottom (last). I am pleased with the colours achieved and satisfied with the resulting minimal waste colour in the water, having used up the vast majority of the dye.

In conclusion

This method is not 100% sustainable in terms of watercourse pollution, but it’s a great improvement and I’m working towards zero. It is a work in progress and I will attempt to refine the process in future. I’m really looking forward to weaving some fabric with this and will post that result in due course!

Some people will really not like to dye anything less than perfectly uniform coloured yarn: this method isn’t for them!

If you have any suggestions or comments, I’ll be really pleased to hear from you.

How handmade does something have to be to be called “Handmade”?

The story of a Handmade Red(ish) Beret

In the past, I used to buy in berets to sell on my market stall and I noticed that the red ones always sold out first. 

These berets were not especially good quality, being items that were mass produced in China, but were popular because they were competitively priced and brightened up my stall display and sold well.

It recently became my aim to make my hats using the most sustainable methods possible and  think that a sheep-to-head provenance for a beret will be second to none.  So the obvious progression is to hand make a red beret using sustainable materials and processes.

Here’s how it happened:

The Dartmoor Greyface sheep that grew the fleeces for this beret graze at Middle Chase Farm near Salisbury.  The sheep mainly eat grass from chalk pastures.  Each sheep has one acre of pasture and the farmer does not use any fertiliser at all. 

The fleeces were brought to me by the farmer en route to another address near me (so that was not even a special journey!).

I washed the fleeces and used the clearer rinsing water to water the garden.

The fleeces were laid out and dried outside in the summer sunshine.

After being carded by hand over several weeks, I then hand-spun the carded rolags into a two-ply yarn, roughly of double knitting thickness.

Finally, I experimented by knitting several shapes and sizes of beret and eventually settled on my own design of a nine-sectioned pattern to ensure that the felted piece shrinks down to a sensible size.  I then experimented with the felting process and now have achieved a lovely knitted fabric that consistently fulls (felts) down in the washing machine to a lovely thick texture and good shape, but without losing its handspun character.

Now for the lovely colour: as a part of another project earlier in the summer, I had a bath of red dye left over.  This couldn’t possibly go down the drain.

Once the soft pale cream beret was felted, I immersed it in the left-over hot dye bath and achieved a lovely dark coral colour. With hindsight (what a wonderful thing) the dye bath could probably have done with a bit more dye added to get a more scarlet colour.  Perhaps I’ll do that next time.

The whole garment travelled less than 100 miles from sheep to hat. The fleece and yarn passed through my hands twelve times (skirting, washing, drying, carding, spinning, plying, skeining, balling, knitting, felting, dying, blocking) so it truly has “Handmade” status. 

My experimental (undyed) berets as well as the original coral red beret are all on sale on the following link:

https://www.numonday.com/shop/sarah-mcalister-hats-caps-for-chaps-and-handmade-textiles/

My beret knitting pattern for felting is not available to the public, but I hope to bring it and some other knitted hat patterns to you in the future.

Please re-visit my blog post “Surrey Tweed 2022: from fleece to fashion” for more details about cleaning and processing the fleeces.

If you would like any hand knitted hats made for you, please get in touch and I’ll be pleased to help.

Cleaning the gunk off your iron: is this the world’s most boring chore?

Is the plate of your iron looking a bit gunked up? Mine gets distinctly grotty after using adhesive fabric backing and interlining. Here’s how I get rid of the gluey residue. As you can see, I have an iron with a shiny soleplate with no coating.

Warning! This may not work if your iron has a special non-stick coating. Please read your iron’s instructions if you are in doubt about using this method.

Please note: I don’t take responsibility for anything that happens to you, your equipment or your iron if you try this method. These instructions are for guidance only. You have to use common sense and make sure you don’t muck about with a hot iron, steam, scourers and electrical equipment.

You will need: a heatproof tray, an old cloth, some washing-up liquid or liquid shampoo and possibly a dish scourer suitable for non-stick cookware.

Squirt a little soap onto the damp cloth. Here, I have used an old facecloth.

First, wet the cloth, wring it out and lay it on the tray, then squirt some liquid soap all across the cloth. Here I have used an old facecloth as the texture of the towelling helps in this process, but a tea towel will work as well.

Switch on the iron to its hottest heat and when it is fully hot, switch it off and unplug it.

Place the iron, plate flat, on the cloth. It will hiss and make steam as the hot iron touches the damp soapy cloth. Move the iron around on the cloth to make a bit of a foam.

After unplugging the iron, put it onto the damp, soapy cloth and move it around slightly to make a foam.

You will see some of the gluey gunk quickly comes off the iron onto the cloth, but you will need to leave it in place, flat on the cloth for a while longer.

The gluey gunk comes off quite quickly onto the cloth

The glue won’t all come off straight away! This is the iron after 10 minutes. At this point, I removed the iron from the cloth and heated it up again. After unplugging again, I laid it back on the cloth and agitated it to get the foam up again, leaving it for a further ten minutes.

Here is the iron after a total of 20 minutes laying on the soapy cloth. These bits of glue are really stubborn and won’t come off without some extra help. At this point, the iron has completely cooled down. Do not do this if the iron is still hot! Here is where I used a gentle scourer to rub the remaining bits of glue. This scourer is suitable for non-stick cookware.

It’s not perfect, but I am now able to use my iron on nice fabrics again.

I hope this helps!

Surrey Tweed 2022; from fleece to fashion

It gives me such a sense of achievement to be able to show you some garments made using wool that I have washed, carded, spun and either hand knitted or woven on my rigid heddle loom into beautiful garments. Truly slow fashion.

In summer 2021, I was lucky enough to take possession of five lovely big sheep fleeces.

Two of the fleeces come from purebred Suffolk rams and three from Dartmoor Greyface ewes. They graze at Middle Chase Farm near Salisbury.  The sheep mainly eat grass from chalk pastures.  Each sheep has one acre of pasture and the farmer does not use any fertiliser at all. 

Each of the fleeces were laid out on a table and then skirted (where the dirty bits are taken off) and the remainder was washed by hand. This took place over several warm summer days, taking full advantage of the sunshine last summer to get the fleeces dried out by laying them out in the garden in the sunshine.

Now, I am part-way through carding and spinning both the Greyface fleeces and have spun a number of skeins of two-ply yarn. When it is carded, this fleece becomes incredibly soft and cloud-like. The yarn has come out roughly aran weight. This has been used to make several beanie and bobble hats and lovely snuggly scarves. It is a very strong yarn but has a lovely halo like mohair.

These items will be on sale in my online shop soon. If you’d like to buy one then please get in touch: sarahmcalisterhats@gmail.com